Mise-en-page preparation
Mise-en-page refers to the page layout of medieval manuscripts. Effective page layout satisfies both the reader in terms of legibility and engagement, and the writer/artist, in that these manuscripts were produced by hand and are works of art.
My parchments have been transformed into quires; and works of art they are not and will not be; but it is fascinating to see how medieval copyists dealt with placement of text on a page, margin size, and ruling the lines that will support the text.
sources of inspiration
The manuscripts below show elements of interesting margin design, text placement and illustration. They helped me decide what kind of mise-en-page I wanted - and what I didn't want!
They also show examples of pricking and ruling.
Example 1: A 12th century Latin manuscript with pricking and rulings, with full lines. Lower and outer margins are larger than upper and inner margins.
First line is above top line:
Example 2: An interesting example of double columns from the 13th century in this Latin manuscript. Very evident ruling, including within the intercolumn area. First line also above top line.
I expect the columns help with legibility, as the text density is pretty high! Nevertheless, there's a good amount of space in that lower margin, which helps to lighten things up a little for the reader:
Tractatus de Viciis; Sermones super Euangelium per anni circulum
Example 3: We find ourselves in the late 15th century, checking out Geoffrey Chaucer's Canterbury Tales, written in Middle English, and written on paper.
The text is contained in a frame, the text may constitute open field writing in that the lines of the paper have determined the writing lines.
The tales are written mostly in verse, a single column per page with plenty of margin space. The outer margin is particularly wide. The mise-en-page of this example suggests that the copyist is determined that, despite the pages and pages of continuous verse, the reader will be able to focus on the text and meaning, helped by plenty of uncluttered space around the text area:
General Prologue - Canterbury Tales
Example 4: The Suchtelen Hours, a beautiful Book of Hours produced in Bruges in around 1500, written in Latin, and the first line is written below the top line.
The rulings are very clear; there is a large upper margin and even larger lower margin; part of the outer margin is devoted to the border illuminations on each side drawing our eye over the whole spread of two pages.
The text is quite large but fits with the whole piece. This really is a work of art!

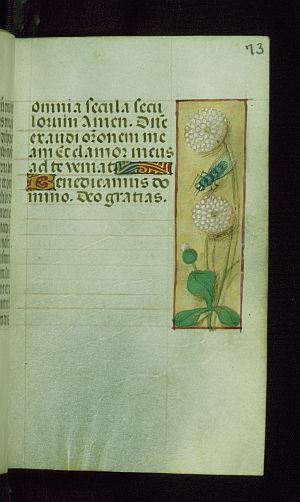
Suchtelen Hours W.176 fol. 72v; fol. 73 r The Walters Art Museum
Mise-en-page for my quires
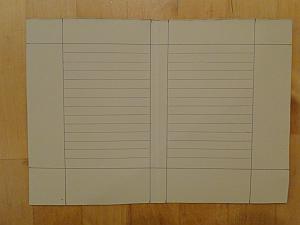
My choice for the mise-en-page followed the "recipe" of Saint Remi, and these pages are laid out for full lines:
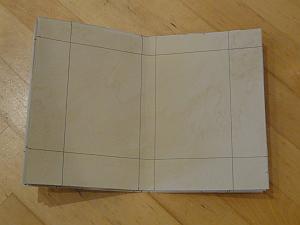
The centre pages of the quire have used the same recipe but with two columns, each set of two being separated by a space called the intercolumn:

I thought about using the Secret Canon mise-en-page for my quires, but I would have had to trim the width of the quires and they are already fairly small.
Nevertheless, I worked out what the Secret Canon would look like for my quires:
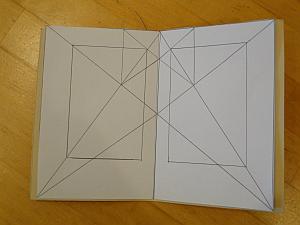
As you can see, there is a little extra parchment left on the left and right of the open pages.
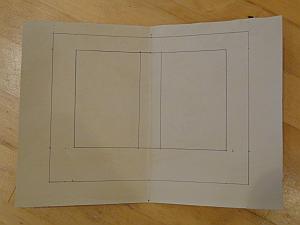
So I had another idea - how about not trimming this quire, but using the Secret Canon on one of the centre double pages of a quire anyway? I would surround the Secret Canon rectangle with a bonus decorated border!
So this is a little bit of a DIY design, incorporating ready-made proportional rectangles from the Secret Canon :)
Here's the result of working out a smaller version and drawing it directly onto the bifolium:
pricking and ruling
Now it's time to rule our lines for writing - but first we'll make prick marks to show us where the lines must go.
Method 1: Marginal pricks using an awl (no awl, sorry, using a needle!)
I used a ruler and a large blunt needle to prick the edge of the folio as I didn't have an awl:

I did this on both outer edges then used a pencil and ruler to make the lines going across the text area on each page:
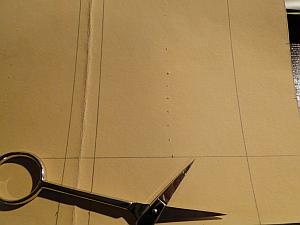
Method 2: In-text pricking with a knife (scissors, actually)
Not having a suitable penknife, I used one of the ends of my embroidery scissors, jabbing away in a knife-like action.
Very early manuscripts would prick down the centre of the text area:
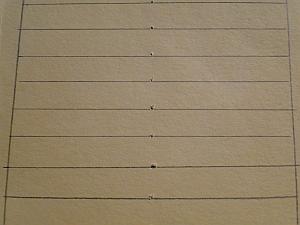
Then I ruled my lines for writing:
Now we have our lines ready, it's time to write - and that's what we'll be learning about in the next episode of the adventure!
Thanks again for reading :)
- Home
- Make a Codex
- Mise-en-Page